Cleaning is the most over-anticipated step in vinyl care. Many people buy a used record, give it a wash first, and then find the noise is still there, so they switch cleaning fluids, switch brushes, switch record cleaning machines, and finally suspect their equipment. The problem often lies at the very beginning: they treat two completely different types of noise as one.
Noise on a record roughly comes from two places—dust and dirt attached to the grooves, and wear or damage that has already occurred to the grooves themselves. Cleaning can only solve the former. Understand this dividing line, and you won't expect one wash to turn a VG record into NM, nor will you dismiss the value of cleaning itself just because nothing changed after washing.
Below, we proceed in the order of "assess first, then clean, finally maintain": first learn to hear the location and nature of the noise, then separately explain what dry cleaning, wet cleaning, and record cleaning machines each solve, followed by water quality, tools, common mistakes, and what to do about those situations that can't be washed away.
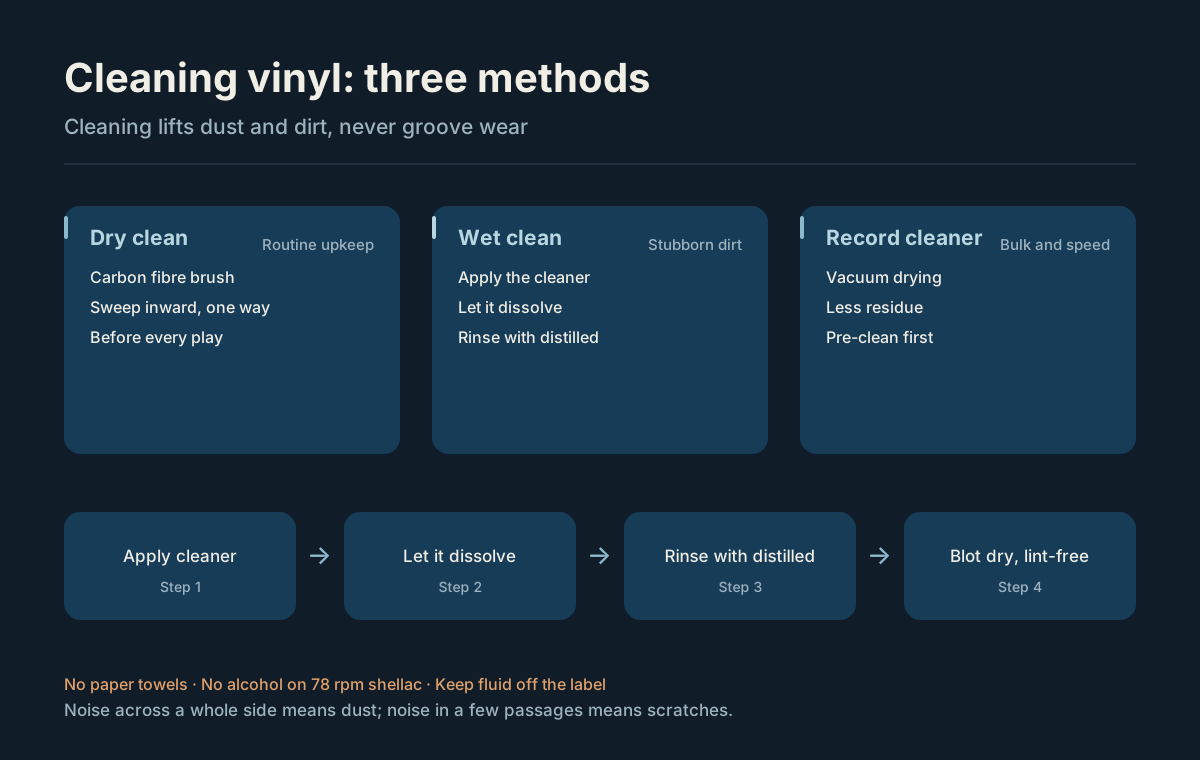
Diagram: Dry cleaning, wet cleaning, and record cleaning machines each handle a segment, and none can solve groove wear.
Key Points at a Glance
- First determine the source of the noise: crackling that is uniform across the entire side is mostly dust and static; crackling concentrated in certain sections is more likely scratches or pressing defects.
- For daily maintenance, use a carbon fiber brush to dry sweep, sweeping along the groove direction from the inside out, doing it once before each play.
- For stubborn dirt, go with wet cleaning: dissolve, lightly brush, rinse with distilled or purified water, absorb and dry—all four steps are indispensable.
- Record cleaning machines solve efficiency and consistency, automating the drying step, but they cannot replace judgment and pre-treatment.
- Shellac records (78 rpm) cannot use alcohol-based cleaning fluids; vinyl (PVC) can, but similarly avoid abrasive ingredients.
- No matter how clean a used record looks, it is worth washing once before its first spin.
First Determine Where the Problem Lies
Before cleaning, spend two minutes assessing, which is far more effective than repeated fiddling afterward. Play a record and pay attention to where and how the noise appears:
- Uniform crackling across the entire side: mostly dust or static. This type of noise will change noticeably after cleaning, and it is the most worthwhile type to tackle.
- Concentrated in certain sections: may be scratches, pressing defects, or hard particles embedded somewhere. Cleaning can remove particles, not scratches.
- Noticeable only at the beginning or end: sometimes a tracking issue, unrelated to cleaning. Checking the tonearm, anti-skate, and stylus condition is more meaningful than washing the record.
- Distortion that appears as volume increases: more likely tracking or stylus wear, not dirt.
- One channel clearly worse: first check the stylus and wiring, then consider the record surface.
There is also a simple comparison method: before cleaning, record a short segment or memorize the noise distribution, then listen to the same segment after cleaning. If the noise distribution has changed, something was removed; if the location and nature are completely unchanged, it is basically physical damage.
Cleaning can improve the first category; do not hold high expectations for the other two. Setting expectations correctly will prevent you from misjudging "can't be washed away" as "wasn't cleaned properly."
Dry Cleaning: Daily Maintenance
Dry cleaning addresses surface dust and static adhesion; its value lies in high frequency and low cost, not thoroughness. The carbon fiber brush is the most commonly used tool, but how you use it matters more than the tool itself:
- Let the brush touch the record surface lightly, allowing the fibers to spread naturally; do not press hard.
- Sweep in one direction, from the inside out; do not saw back and forth—sweeping back and forth just pushes dust around.
- Let the brush follow the record for two or three rotations to bring dust out of the grooves, then lift the bristles along the edge.
- Clean the bristles on the brush stand after each use; a brush that accumulates dust itself loses its purpose.
- Replace the brush immediately when the bristles deform, clump, or get contaminated with oil; do not force continued use.
Anti-static brushes can also reduce static adhesion, with a more noticeable effect in dry seasons, but they cannot remove dirt already pressed into the grooves. Similarly, cleaning rollers are good for picking up floating dust on the surface, but powerless against dirt deep in the grooves.
Dry cleaning can be done frequently: sweeping once before each play is more effective than a major wash every few years. This is also the key to making cleaning actually happen—keep the tool next to the turntable, and the action will become a habit.
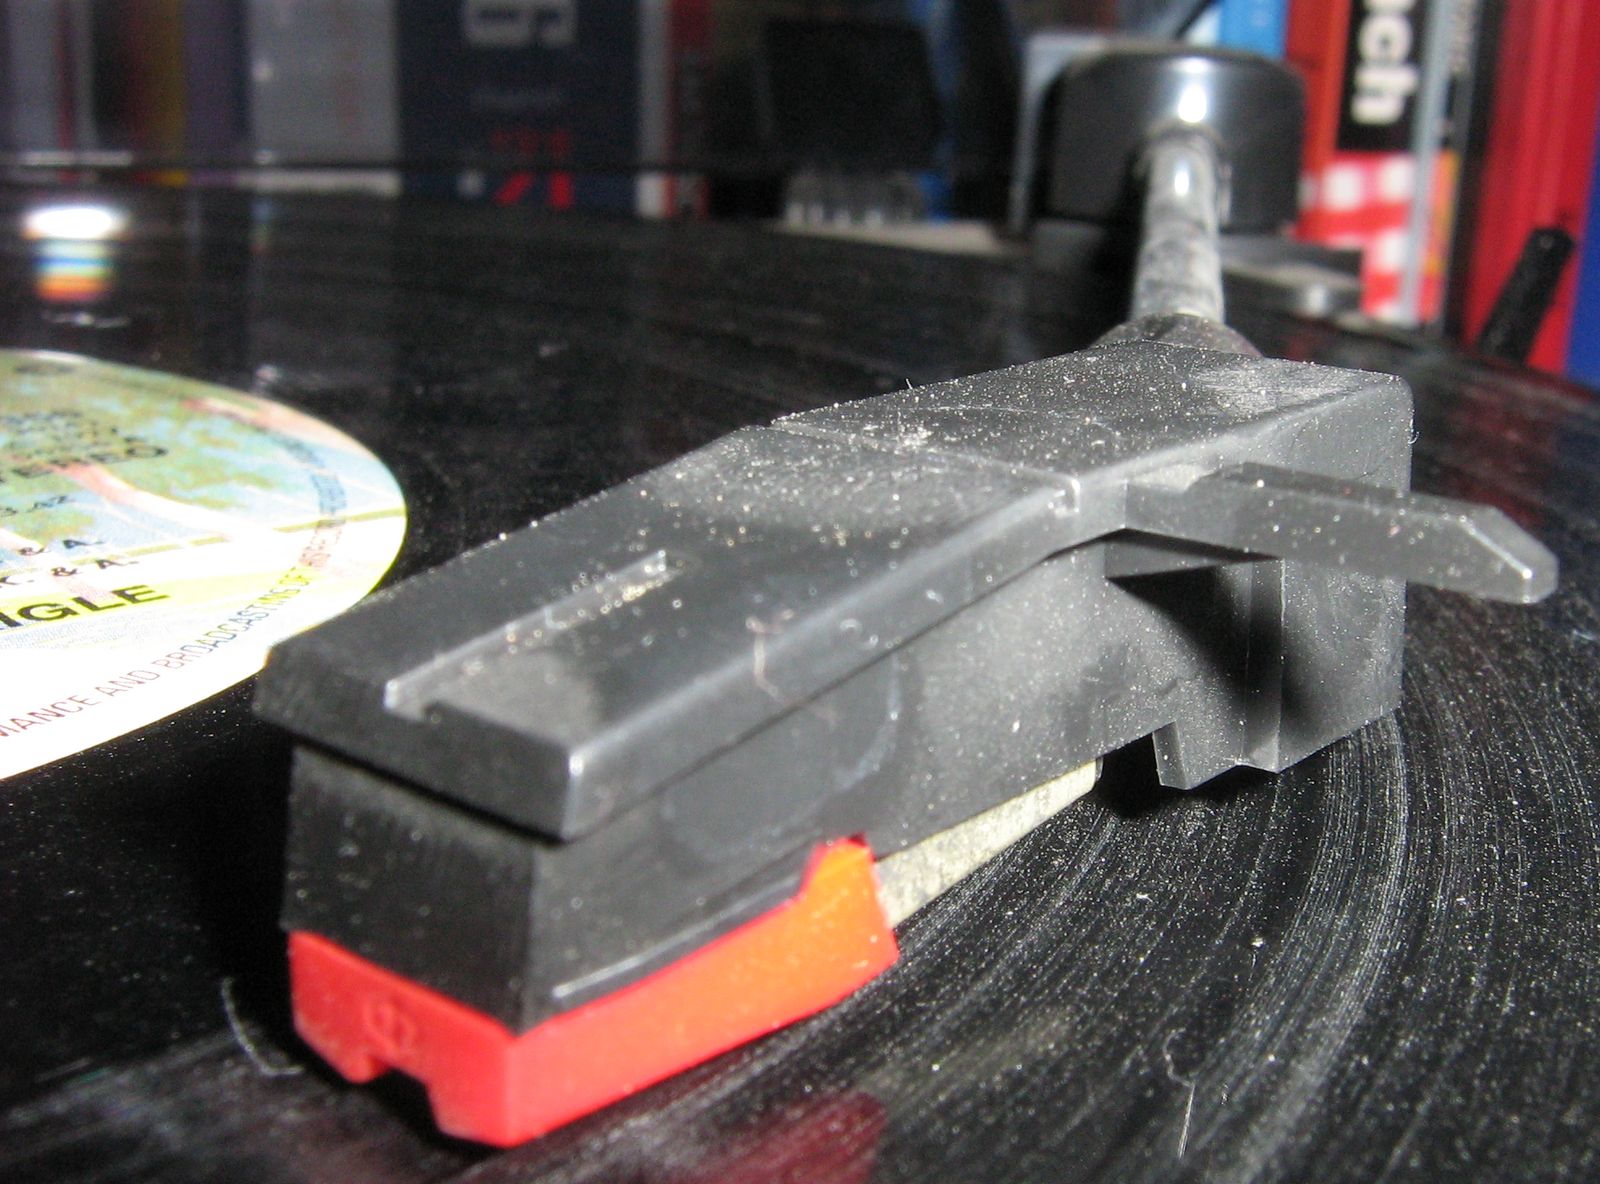
Uniform crackling across the entire side mostly comes from surface dust and static like this.
Wet Cleaning: Tackling Stubborn Dirt
The core of wet cleaning is "dissolve the dirt, then carry it away." Simply wiping the record surface with cleaning fluid only spreads the dirt evenly; after it dries, it is still in the grooves, perhaps even more widely distributed.
Basic process:
- Apply cleaning fluid to the record surface and gently brush along the groove direction with a soft brush to let the liquid enter the grooves.
- Let the cleaning fluid sit for a while to dissolve the dirt; do not let it dry completely on the record surface.
- Rinse thoroughly with distilled or purified water to carry away dissolved matter and cleaning fluid residue.
- Absorb with a lint-free cloth or absorbent material, then let it air dry naturally.
A few details that are easy to get wrong:
- Use a dedicated brush: Keep the cleaning brush separate from the carbon fiber brush used for daily dry sweeping; do not carry cleaning fluid into the dry brush.
- Avoid the label: Liquid seeping into the label causes irreversible damage. When working, tilt the record so the liquid stays away from the label area, or use a label protector.
- Do not use force: The grooves are very shallow; brushing hard will not clean better, it will only leave new fine scratches on the groove walls.
- Handle only one side at a time: Before flipping, confirm this side is already rinsed and absorbed dry to avoid cross-contamination between sides.
- Rinsing is more important than applying: Residual cleaning fluid becomes a new noise source after drying and also attracts dust.
If a batch of records includes 78s, be sure to handle them separately. Most 78s are made of shellac, which is more brittle than PVC and more sensitive to alcohol-based and alkaline cleaners; clean them with gentler methods, and note that the stylus specifications differ—78s usually require a coarse stylus of about 3 mil, while LPs use a fine stylus of about 0.7 mil, and mixing them will damage both the stylus and the record. For background on the differences in record materials and playback methods, you can refer to the basic explanation in How Vinyl Works.
Additionally, old records that sound "off" are not necessarily dirty. The RIAA equalization curve was not standardized before 1954, and manufacturers used different equalization schemes; if the curve does not match during playback, the sound will be too bright or too dark. This is a playback issue that cleaning cannot solve. For related background, see RIAA equalization.
Water Quality and Drying
Water quality is the most underestimated variable in wet cleaning. Minerals in tap water remain in the grooves after drying, creating new noise sources and even leaving visible water spots on the record surface. Since the purpose of wet cleaning is to remove dirt, the final step should not leave new things behind.
- Prefer distilled or deionized water: Use it for rinsing and the final rinse. The cost is not high, and the difference in results is obvious.
- If you really must use tap water: At least switch the final rinse step to purified water, and try to blot it dry rather than letting it air dry.
- Drying tools must be clean: Lint-free cloths, microfiber cloths, or specialized absorbent materials are all fine, but replace them when dirty. Do not use one cloth from a dirty record to a clean record.
- Keep ventilation when air drying: Stand them upright or lay them flat in a clean, low-dust place to avoid dust settling.
- Do not use a hair dryer or hot air: Localized heat increases the risk of warping; vinyl is not tolerant of temperature.
The drying method also affects how soon you can listen to the results. The more thoroughly you blot, the shorter the drying time and the lower the risk of water spots. This is also the main reason record cleaning machines exist.
Record Cleaning Machines: Efficiency and Consistency
Record cleaning machines automate the drying step and are suitable for people with large record collections. Vacuum drying can quickly remove residual liquid, reducing drying time and lowering the risk of water spots; when processing a batch of second-hand records uniformly, it also makes the results more consistent from record to record.
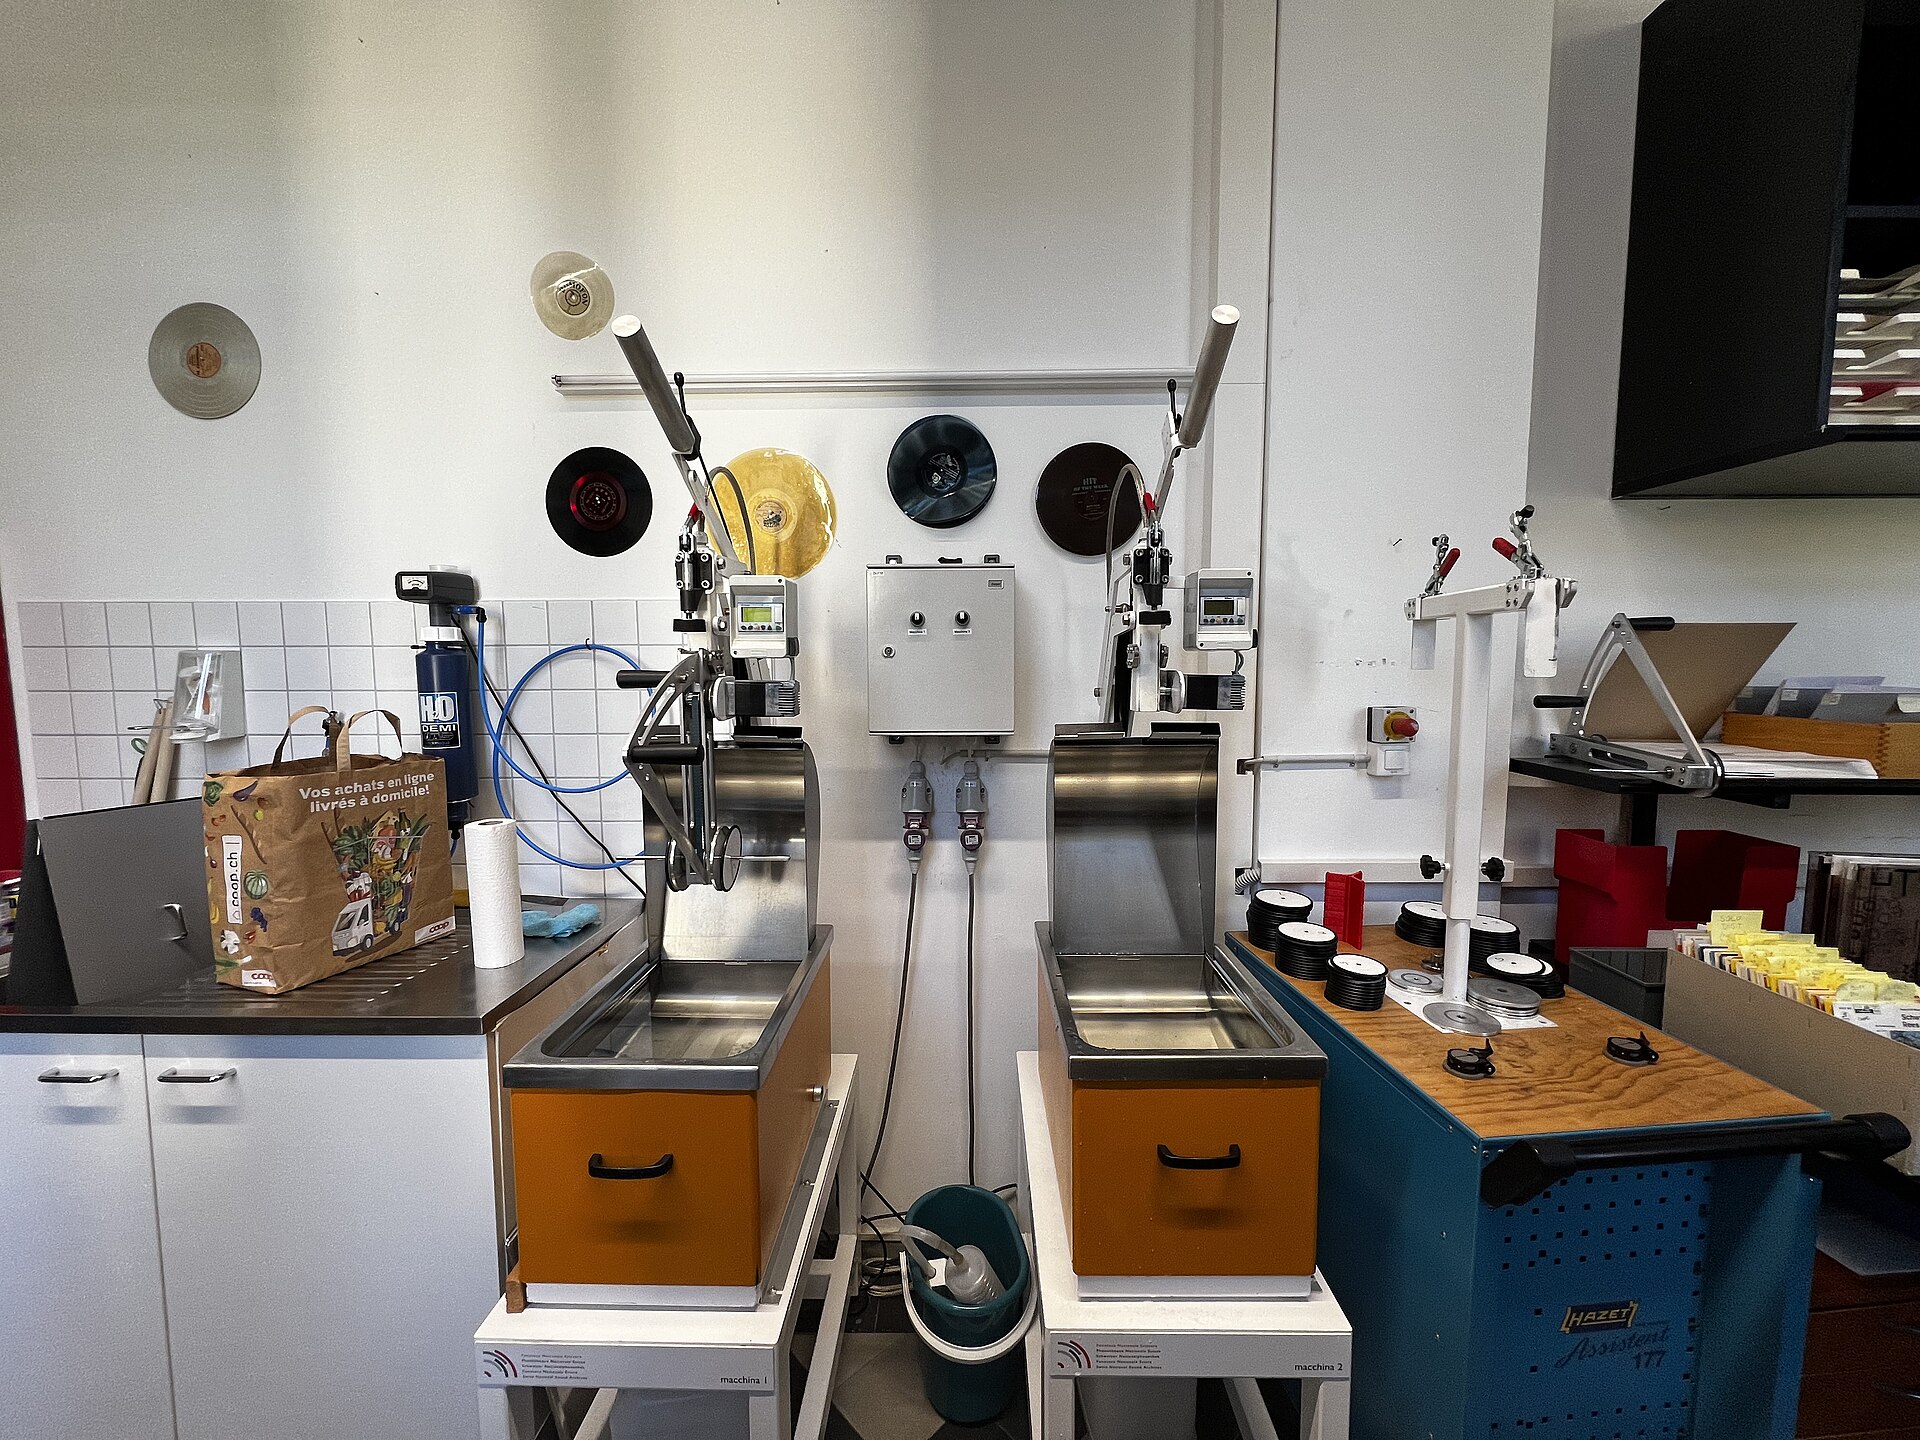
Record cleaning machines automate the drying step, reducing water spots and drying time.
A few points worth noting when purchasing and using one:
- The drying force should be gentle: Excessive suction nozzle pressure or improper speed settings may cause new wear on the record surface.
- Clean the nozzle and felt regularly: If the nozzle itself is dirty, it is like smearing dirt back onto the record.
- Match the cleaning fluid: Different machines have different requirements for liquids. Follow the instructions and do not mix them arbitrarily.
- Pre-treat before using the machine: For very dirty records, remove surface dust and mold with a dry brush or manual wet cleaning first to avoid bringing large chunks of dirt into the machine.
A record cleaning machine cannot replace judgment. It shortens the process time, not changes the source of noise—groove wear still exists, you just hear it more clearly. For records that have been stored long-term and have a foggy surface, the machine also cannot solve problems at the material level.
Things Not to Do
- Do not use alcohol to clean shellac records (78s). Alcohol damages shellac. Vinyl (PVC) can use isopropyl alcohol-based cleaning fluids, but 78s cannot.
- Do not use paper towels. Paper fibers remain in the grooves and become a new noise source after drying.
- Do not use household cleaners. Fragrances, dyes, and abrasive ingredients may remain on the record surface.
- Do not wipe the label. Liquid seeping into the label causes irreversible damage.
- Do not use the same cloth from a dirty record to a clean record. Cross-contamination will make you suspect the cleaning fluid when the problem is actually the cloth.
- Do not use "restorative" products containing abrasive particles. The groove depth of vinyl is very small; abrasion will literally shave off the signal.
- Do not spray cleaning fluid directly on the turntable. Liquid may flow into the bearings, motor, or label area.
- Do not blow on it with your mouth or breathe on it. Saliva and moisture leave marks and may introduce new dirt.
There is another category of methods that falls between effective and dangerous: putting records in a dishwasher, blasting them with a pressure washer, or peeling off a whole layer of glue. They either rely on specific conditions or carry risks far greater than the benefits, and are not recommended as regular methods.
After Cleaning and Long-Term Care
Cleaning is not the end. If a cleaned record continues to use an old inner sleeve and is stored in a dusty environment, it will return to its original state within a few weeks.
- Replace inner sleeves: Old paper inner sleeves shed debris and can react with the record surface over time. Acid-free or anti-static inner sleeves are a safer choice; the criteria are that the inner sleeve doesn't shed, doesn't release acid, and doesn't leave static on the record surface.
- Store vertically: As with shelving, store vertically, fill the space, and don't let records press against each other. Long-term stacking flat can cause warping.
- Control the environment: Avoid direct sunlight, proximity to radiators, or damp walls; areas with drastic humidity changes are more prone to mold.
- Store cleaning tools separately: Keep brushes, cleaning solutions, and absorbent cloths in their own places to avoid cross-contamination.
- Record the condition: The record surface changes after cleaning, so jotting it down will save you trouble. If you have a sizable collection, use GROVV to manage your collection to note 'cleaned, re-sleeved, condition' on the record entry—more reliable than relying on memory.
As for condition descriptions—which noises disappeared after cleaning and which remain—it's best to write them clearly according to the Vinyl Condition Grading Guide. This is useful for your own review and for communication with others; descriptions like 'a bit old' help no one.
Frequently Asked Questions
I cleaned it once and it didn't work. Is the cleaning solution no good?
Don't change products yet; look at the process first. The most common issues are incomplete rinsing, water spots left during drying, or dirt that wasn't dissolved before being wiped away. Also, confirm the type of noise: if it's a burst of pops concentrated in certain sections, it's likely scratches, and no amount of cleaning solution will change that.
Should I clean newly purchased second-hand records first?
It's recommended. Second-hand records have been through uncertain storage conditions; surface dust, paper debris, and static attraction are common, and even if they look clean, there may be something in the grooves. Treating them before the first play protects the stylus and gives you a more accurate assessment of the record's true condition.
Can a carbon fiber brush replace wet cleaning?
No. A carbon fiber brush handles surface dust and static; its effect on dirt pressed into the grooves is limited. The two are complementary: dry brushing is for high-frequency maintenance, wet cleaning for periodic treatment of stubborn dirt. You can dry brush very frequently, while wet cleaning is done as needed.
How should moldy records be handled?
Mold spots are a separate category of problem; the usual cleaning solution methods may not apply, and the handling environment and protection require extra attention. Its assessment and treatment approach differ from routine cleaning. It's recommended to first determine the extent of mold, then decide whether to clean, isolate for observation, or discard.
Are record cleaning machines worth buying?
It depends on quantity and frequency. If you only occasionally handle a few records, manual wet cleaning is completely sufficient and much cheaper. If you often process second-hand records in batches, or want more consistent results and faster drying each time, then the efficiency advantage of a record cleaning machine truly shows. Don't buy a machine ahead of time out of 'fear of not cleaning well enough'—the problem is usually not the equipment.
Final Thoughts
The difficulty of cleaning is not in the tools, but in judgment. First, listen carefully to where the noise comes from, then decide whether to dry clean, wet clean, or use a machine; clean what should be cleaned, honestly record what can't be removed, and don't use more aggressive methods to chase a condition it never had. Keep a carbon fiber brush next to your turntable and sweep before each play—this is closer to the essence of 'maintenance' than an occasional deep clean.
Image Credits
Photos in this article are from Wikimedia Commons and used under the licenses indicated for each image; diagrams are created by GROVV.
- A record cleaning machine automates the drying step, reducing water spots and drying time: Ferdinando Traversa · CC BY 4.0 · Source
- A uniform crackling sound across the entire surface mostly comes from surface dust and static like this: Crispin Semmens · CC BY-SA 2.0 · Source

